Pin It
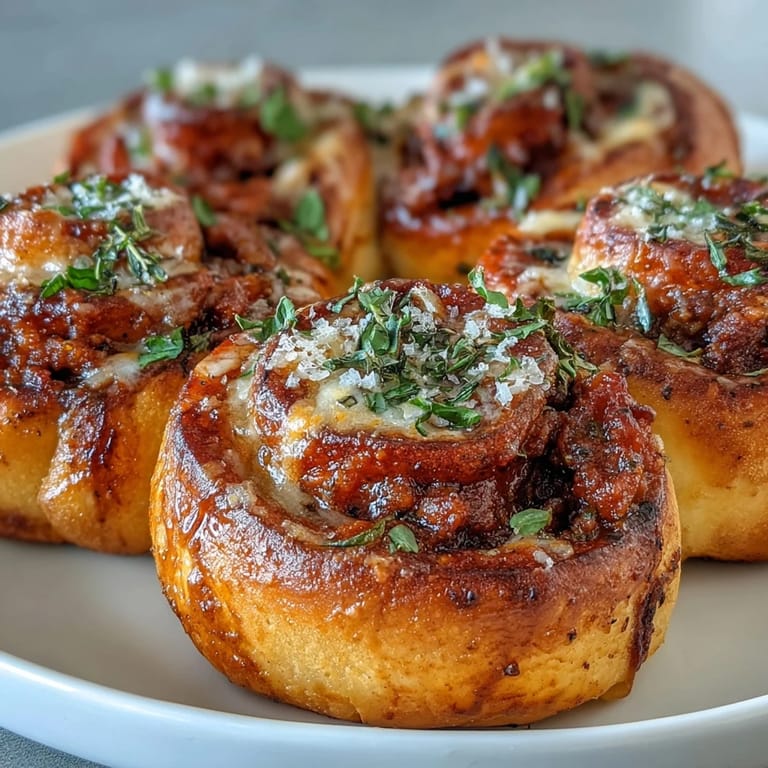
 The smell of melted mozzarella and browned beef hits differently when you realize youre eating pizza without the guilt. I started making these rolls on a rainy Sunday when I had leftover Greek yogurt and a serious craving for something cheesy and warm. The dough came together so fast I thought I missed a step, but nope—thats just how this magic works. My kitchen smelled like a pizzeria within minutes, and I ended up eating three straight off the pan. Theyre now my go-to whenever I need something that feels indulgent but keeps my macros in check.
I packed a few of these for my cousin during her long shift at the hospital, and she texted me a photo of the empty container with about five fire emojis. She said it was the first time she actually looked forward to her break meal instead of dreading another sad salad. That moment reminded me why I love cooking—food like this doesnt just fill you up, it makes people feel cared for. Now I double the batch every time and keep a stash in the freezer for busy weeks. Honestly, future me is always grateful.
Ingredients
- Plain Greek yogurt (2 cups, nonfat or low fat): This is the secret base of the dough, giving it structure and a sneaky protein boost without any tang once baked.
- Self rising flour (2 cups): The leavening agents inside create lift and softness, so you skip the yeast and still get fluffy rolls.
- Large egg (1): Binds the dough together and adds richness, plus a little extra protein never hurt.
- Garlic powder (1/2 tsp): Adds a subtle savory note to the dough that pairs perfectly with the pizza vibes.
- Salt (1/2 tsp): Balances the sweetness of the yogurt and wakes up all the other flavors.
- Lean ground beef (200 g, 5% fat or less): Keeps the filling hearty and high protein without drowning everything in grease.
- Turkey or beef pepperoni slices (80 g): The classic pizza topping that brings smoky, salty goodness in every bite.
- Shredded part skim mozzarella cheese (1 cup): Melts into gooey perfection and holds the filling together like edible glue.
- Pizza sauce (1/2 cup): The tangy, tomatoey backbone that makes these taste like actual pizza.
- Dried Italian herbs (1 tsp): Oregano and basil give that classic Italian aroma and flavor depth.
- Black pepper (1/2 tsp): A little heat and sharpness to cut through the richness of the cheese and beef.
- Crushed red pepper flakes (1/4 tsp, optional): For those who like a gentle kick without setting their mouth on fire.
- Olive oil (1 tbsp): Brushed on top to help the rolls brown beautifully and add a hint of richness.
- Grated Parmesan cheese (2 tbsp): Adds a salty, nutty crust on top that crisps up in the oven.
- Dried parsley or Italian herbs (1 tsp): A final flourish that makes them look and taste homemade, not frozen aisle.
Tired of Takeout? 🥡
Get 10 meals you can make faster than delivery arrives. Seriously.
One email. No spam. Unsubscribe anytime.
Instructions
- Preheat and Prep:
- Set your oven to 400°F (200°C) and line a baking sheet with parchment paper so nothing sticks. This is also a good time to clear some counter space for rolling out the dough.
- Cook the Beef:
- Heat a nonstick skillet over medium and add the ground beef, breaking it up with a wooden spoon as it browns (about 4 to 5 minutes). Drain any excess fat, then stir in black pepper and Italian herbs before setting it aside to cool a bit.
- Make the Dough:
- In a large bowl, combine Greek yogurt, self rising flour, egg, garlic powder, and salt, stirring until a sticky dough forms. Turn it out onto a lightly floured surface and knead for 2 to 3 minutes until it feels smooth and pliable.
- Roll It Out:
- Use a rolling pin to shape the dough into a rectangle roughly 12 by 10 inches. Dont stress about perfection—rustic is charming.
- Spread the Sauce:
- Evenly spread pizza sauce over the dough, leaving about a half inch border around the edges to prevent overflow when you roll.
- Add the Filling:
- Scatter the cooked beef, pepperoni slices, and shredded mozzarella evenly over the sauce. The smell at this point is already dangerous.
- Roll It Up:
- Starting from one long edge, tightly roll the dough into a log, keeping everything tucked in as you go. Slice the log into 12 equal pieces with a sharp knife.
- Arrange and Top:
- Place the rolls cut side up on your prepared baking sheet, brush the tops lightly with olive oil, then sprinkle with Parmesan and dried parsley or herbs.
- Bake:
- Slide the pan into the oven and bake for 18 to 22 minutes, until the rolls are golden brown and the cheese is bubbling happily. Let them cool for a few minutes before diving in.
 Pin It
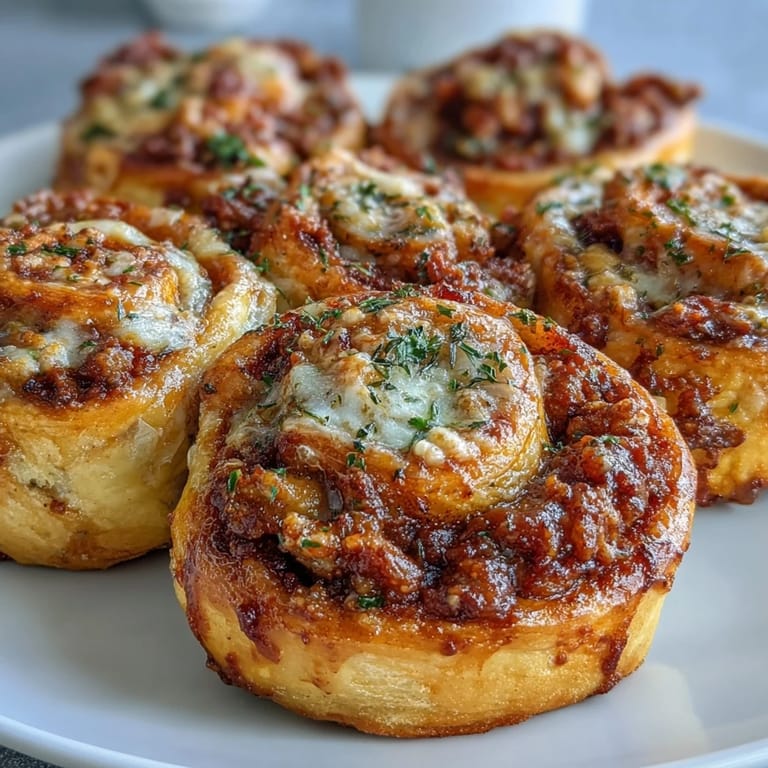
 The first time I made these for a potluck, someone asked if I ordered them from a fancy meal prep service. I just laughed and said nope, made them in my tiny apartment kitchen with stuff I already had. That compliment stuck with me because it proved you dont need a professional setup or expensive ingredients to make something people genuinely enjoy. These rolls have this way of making ordinary weeknights feel a little more special, and thats the kind of cooking I want to keep doing.
Customizing Your Rolls
One of my favorite things about this recipe is how flexible it is once you nail the base. Ive swapped ground turkey for the beef when I had it on hand, and it worked just as well with maybe even a cleaner flavor. You can also sneak in finely chopped bell peppers or a handful of spinach if youre trying to add veggies without anyone noticing. I once threw in some diced jalapeños for a friend who loves heat, and she declared them better than takeout. Play around with the filling and make it yours—the dough will support whatever you throw at it.
Storage and Reheating
These rolls are meal prep gold because they freeze beautifully and taste just as good reheated. I let them cool completely, then stack them in a freezer safe container with parchment paper between layers so they dont stick. When Im ready to eat, I just pop one or two in the oven at 350°F for about 10 to 12 minutes straight from frozen, and theyre as good as fresh. Even in the fridge, they last up to four days and reheat in the microwave in under a minute, though I prefer the oven for that crispy top. Honestly, having these ready to go has saved me from so many bad food decisions.
Serving Suggestions
I usually serve these with a side of marinara for dipping, and it feels like a full pizza experience without the carb overload. Theyre also great alongside a simple green salad or some roasted veggies if you want to round out the meal. My brother likes to eat them with hot sauce, which sounds weird but somehow works. You could even pack them in a lunchbox with some cherry tomatoes and cucumber slices for a balanced, portable meal.
- Pair with extra marinara, ranch, or garlic aioli for dipping.
- Serve warm with a crisp side salad dressed in balsamic vinaigrette.
- Pack them cold for lunch—they still taste amazing at room temperature.
 Pin It
 These rolls have become one of those recipes I make without thinking, the kind you reach for when you want comfort and convenience in one bite. Theyre proof that eating well doesnt have to be boring or complicated, and honestly, thats the best kind of recipe to have in your back pocket.
Your Questions Answered
- → Can I freeze these rolls?
Yes, these freeze exceptionally well. Once cooled, place in an airtight container or freezer bag for up to 3 months. Reheat from frozen at 350°F for 10–12 minutes until heated through.
- → What can I use instead of self-rising flour?
Mix 2 cups all-purpose flour with 3 teaspoons baking powder and 1/2 teaspoon salt. This combination creates the same rising effect as self-rising flour in the dough.
- → Can I make these with different meats?
Absolutely. Lean ground turkey or chicken work well as substitutes for beef. You can also use turkey pepperoni or add cooked crumbled sausage for variety.
- → How do I store leftovers?
Keep cooled rolls in an airtight container in the refrigerator for 3–4 days. Reheat in the oven at 350°F for 5–7 minutes to restore crispness, or microwave for 30–60 seconds.
- → Can I add vegetables to the filling?
Yes, finely chopped bell peppers, spinach, or mushrooms make excellent additions. Sauté them briefly with the beef to remove excess moisture before adding to the filling.